Introducing a 1970 300 TNT convertible

Illinois standard auto plate: 151$ late fee 20$ per year...
EA plate (auto/light truck) 55$ per year...
AV auto/truck plate 35$ for five year period..

New or replacement title 150$... Takes four to six weeks to receive new title..


.
 
Today begins w/ removal of the heater box for rebuilding. Much to my surprise the engine side housing was free of cracks which are common as these assemblies. I had expected to find frozen retaining nuts, just the usual shrunken case seals were found. Still more rodent nesting was found in both the blower mtr. and the evaporator. Some quick tips, remove the RT. inner splash panel, passenger seat if equipped w/ bucket seats and the center console. Access to the heater box is so much easier this way. For originality the natural finish fiberglass will be retained. Note the location of the ground wire for the blower mtr. Tomorrow the heater box comes out to be evaluated and prepped for re-assembly.

DSC04395.JPG


DSC04396.JPG


DSC04398.JPG


DSC04399.JPG


DSC04400.JPG


DSC04401.JPG


DSC04402.JPG


DSC04403.JPG


DSC04404.JPG


DSC04405.JPG
 
Removal of the heater box is now completed w/ only a few surprises. The radio w/ the foot operated search feature had to be removed to clear the actuators and linkage. As the pictures below reveal the overall condition is very good. Except for some overspray, the heater box assembly has retained the original finish and inspection stamps. Blower mtr. is original OEM. Would be a good idea to replace it now given its location and accessablity. DMT kit will be here by the weekend. Found a pinched vac. supply hose. All foam seals are dry rotted away.

DSC04403.JPG


DSC04404.JPG


DSC04411.JPG


DSC04412.JPG


DSC04413.JPG


DSC04414.JPG


DSC04415.JPG


DSC04427.JPG


DSC04428.JPG
 
With the heater box out the next was to replace the dash lights dimmer switch, also the fuel gauge read way off and since I was there pulling the speedo / gauge cluster it's time to find my fuel gauge problem. As the photos show below the cluster assemb. came out w/o too many obstacles. The surprises were this cluster had been removed previously and there were so many missing screws. I think the wrong fuel gauge may have been installed. Its fitment was less than professional.

DSC04429.JPG


DSC04415.JPG


DSC04417.JPG


DSC04418.JPG


DSC04419.JPG


DSC04420.JPG


DSC04422.JPG


DSC04424.JPG


DSC04425.JPG


DSC04426.JPG
 
With the heater box out the next was to replace the dash lights dimmer switch, also the fuel gauge read way off and since I was there pulling the speedo / gauge cluster it's time to find my fuel gauge problem. As the photos show below the cluster assemb. came out w/o too many obstacles. The surprises were this cluster had been removed previously and there were so many missing screws. I think the wrong fuel gauge may have been installed. Its fitment was less than professional.

View attachment 524455

View attachment 524456

View attachment 524457

View attachment 524458

View attachment 524459

View attachment 524460

View attachment 524461

View attachment 524462

View attachment 524463

View attachment 524464

David: You are doing an amazing job here. Like you, I am often disappointed when I find some bubba before me has done a half-assed job, and I have to do it all over correctly. I'm following your efforts here, because I know I'll hafta do the same job on the heater box in my '66. . .
 
The dimmer switch is on its way back from Oklahoma after restoration from @Devinism -- thank you for great communication and speedy turnaround!

In other electrical matters, this first owner installed aftermarket electronics as he made the car his back in the seventies. Here is a photo:

IMG_4288.JPG


1. On top is what seems to be a Bel Microeye Express Remote radar detector.

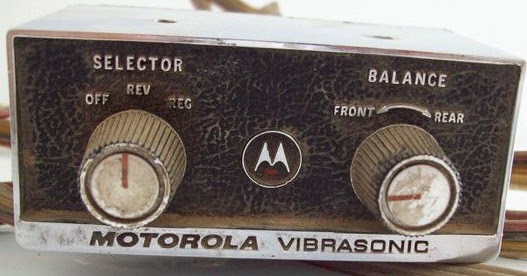
2. On the bottom, sitting on the console, is a Motorola Vibrasonic. More info on this reverb can be found on this page, which states that "they seem to have been used to give a more interesting sound effect to a radio, before Stereo was invented, on vacuum tube single speaker radios":


One commenter on that article, speaking of his experience, confirms that the item improved the sound substantially. Here is an illustration on YouTube:


I am in the process of deciding whether to remove these items and the floor speakers. Thanks to @71Polara383), I have two original uncut kicker panels to replace the ones that the first owner had cut to install aftermarket speakers. As for the reverb, if it still works, it may be worth keeping?
 
Last edited:
I can update you that the Motorola Vibrasonic reverb does work. The Micro Eye I don't know.
Chances are that even if it did work, it's so old that it won't detect the newer frequencies.

You have to stay pretty current to keep up with the cop radar tech...
 
Here is the latest update on the dash dimmer replacement. Numerous screws both sheet metal and machine 8/32 were missing. Since I had the dash fascia a part. While out I gave it a good cleaning and polished the clear lens to perfection. The printed circuit board several loose pins which I solder in place.8/32 screws were easy to come by, sheet metal screws not so much. A little metal polish on the rocker and wiper switches made them look like new. To install have your steering wheel removed for reinstall, makes dash assemb control much easier. Pull the switch connectors out as far as possible. cover the bottom of the dash pad and cover the opening w/ a old bath hand towel. Rest the bottom of the dash cluster on the towel and pug in the wire harness. Next tip the top in first 4 to 6 " from the left side of the dash opening. Be sure not to bend the pins on the circuit board. As you feed and roll the dash in the dash opening recenter it to the left as it goes in. Plugging in the dash cluster should only be done after the light, wiper, washer,4 way flashers and clock are plugged in. The heater controls can be plugged in after dash cluster install. Don't forget your warning lamp ground wire.

DSC04419.JPG


DSC04420.JPG


DSC04421.JPG


20220417_120723.jpg


20220417_120743.jpg


DSC04418.JPG


DSC04419.JPG


20220419_223637.jpg
 
I just went through my 1971 Imperial dash cluster, just like you have done, about 2 weeks ago now. After more than 50 years, it was long overdue to ensure trouble-free future electrical system operation. I decided to opt for some new reproduction circuit boards that are more sturdy than the originals (especially the pins as you discovered) and I also installed a solid state voltage limiter and therefore also removed the capacitor to suppress radio interference since it isn't needed with a solid state limiter (as opposed to the original contact points limiter).
It also looks like you used a couple of white and chrome paint pens to make the cluster bezel letters and surrounds look like new also. You are someone that I would definitely trust to do things right. Well done!! @ayilar chose the right guy to do the work on his cars.

I also agree that those clusters also require a lot of patience to get them to fit back in the instrument panel and need to be done carefully to prevent any damage.

Excellent!
 
First I had seen this thread. So the car is back in Indianapolis for more work? Or has been in Indy since summer of 2021?
 
Here is the conclusion of the heater box rebuild. I highly advise that reference photos be taken prior to heater box disassembly. A paint pen is useful when making witness marks which can be removed w/ brake clean upon completion. See photos below.

DSC04437.JPG


DSC04438.JPG


DSC04439.JPG


DSC04440.JPG


DSC04441.JPG


DSC04442.JPG


DSC04443.JPG


DSC04444.JPG
 
As you see in the photos below the overall condition shaft mounts in the heater box were like new. In high temp climates they are prone to breaking off they can be repaired. heater core was checked for leaks.

DSC04446.JPG


DSC04447.JPG


DSC04448.JPG


DSC04449.JPG
 
For adequate complete seal gently scrape the old gaskets off and sand down smooth if necessary. Do not stretch the seals in place, if you do they will leak. see photos below.

DSC04474.JPG


DSC04475.JPG


DSC04476.JPG
 
To aid in resealing the air recirculating door use a hand operating vac. pump position the door for surface prep and foam seal installation. Note the use of newspaper below to keep contact cement off the housing.

DSC04480.JPG


DSC04481.JPG


DSC04482.JPG
 
Lastly some install tips. Have your carpet pulled back as shown. It makes a world of difference in the ease of rotating the heater box up under the dash. Have your support bracket positioned upwards as seen in the photo below. When in position with the retaining nut on the stud you can quickly remove the nut and slip the bracket on. This is a easy way too free up your hands.

DSC04484.JPG


DSC04484.JPG


DSC04485.JPG


DSC04487.JPG
 
Back
Top