T-Cows 68 T/C wagon updates...

thrashingcows

Senior Member
Joined
May 15, 2012
Messages
3,254
Reaction score
2,620
Location
British Columbia
Well I decided I better start a thread for updates on the old wagon.

I'll post up the info I have in other threads so its in one spot. And then continue adding stuff to this thread in the future.
 
Aug 23/12

Well I've been busy working on the fleet...and finally taking a few minutes to update a few threads.

I finally got tired of the front rotors on the wagon shuddering. They got warped while driving through some nasty hills and having to brake A LOT!! Anyway it was to the point I didn't want to drive the ol' girl...and I couldn't have that. So I decided to take a chance on some drilled and slotted rotors I saw on E-bay.

I put a set like these ones on all 4 corners of the wife's 02 Concorde....love the braking!! SO figured I'd give them a chance at $160 Delivered!!

Here they are...

PICT6433.jpg


PICT6434.jpg
 
And old verses new installed....

PICT6442.jpg


PICT6441.jpg


Only thing I should have done first before installing them is wash them thoroughly in the parts washer. There was a lot of small metal debris from the machining inside the rotor. It got allover the place, and even behind the brake pads. Had to pop off the calipers and pads when one side started grabbing harder then the other. But a good cleaning had things working properly.

As for the braking...Couldn't be happier! It hauls down from speed very quickly.​
 
Aug 23/12

After taking the wagon to the street legal drags last week I decided to try changing my ignition system from the pertronix to the tried and true Mopar Electronic ignition. I picked up a junkyard 440 electronic dizzy a year or two ago from a 78 1/2 ton dodge van with a factory 440 in it!! Anyway I was just going to toss it in but decided I better open it up and check things out...glad I did!!

PICT6480.jpg


PICT6479.jpg


As you can see the dizzy had some rust in it. Never seen this kind of rust inside a dizzy before. I'm thinking maybe the van ended up in a river, or lake. And only some of the water got out of the dizzy and the rest caused all the rust. Anyway some time in the parts washer, and some time with some 280 grit sand paper and PB Blaster cleaned everything right up.

PICT6482.jpg


Reassembled everything with a good coating of motor oil and installed it.​
 
I then had to wire up the electronic control module. Got a darn good wiring diagram from some guy on moparts...when I bought a bunch of slant 6 stuff for my Desoto. Anyway real easy wiring, but needed to figure out where to mount the box. First I was going to mount it under the batter tray...but was looking at the 40 feet of wiring I was going to need and thought there had to be a better place. Didn't want to drill any new holes in the firewall, so was standing looking at things when I remembered a factory? or aftermarket mounting location on the back side of RB and B motors.

So off to my bucket of misc brackets and crap and found a bracket piece off a 93 Cummins A/C condensor. The holes lied up perfectly with the back bolt holes. Just needed to weld on a couple nuts and bolt it together.

PICT6486.jpg


And installed....

PICT6487.jpg


PICT6488.jpg
 
Put on a nice new shiny control box and turned the key...and....Nothing!! Checked to make sure I had wired it up properly...yup. Checked my 12V ignition source...no problems. Then pulled a plug wire and installed a plug...no spark! So off came the new shiny control box and on went an original until from say 1975-ish? Anyway got everything reinstalled and turned the key and it fired right up...even though I still had the plug wire unhooked from the motor and plugged into the spare spark plug...:)

Tried to time the motor but could get a visual on the timing mark. Tried the white chalk/soap stone I've been using for years...nothing. Changed which plug wires I was using...still no sign of it. Tried black felt...again nothing. Not sure why I couldn't get a visual on the timing mark, but regardless I did the timing by ear and by vacuum. Took it for a drive...had to adjust the timing a couple more times..but finally got it hauling a$$.

Motor has never run so strong! Before I could not get the back tire to light up (no suregrip) Now I barely give it some throttle and that back tire is spinning. Also when I first fired the motor it was smoking badly...I initially thought I had hurt something in the old motor when pounding on it down the quarter mile. But after a few runs out on the street it seemed to clear up. I think it now has a hot enough spark to burn off the crud that used to build up on several of the plugs, and pistons. I think the old pertronic was just WEAK!!

Also found the vacuum advance canister on the pertronix dizzy was toast...sucking air. Think this is where my idle fluctuation was coming from. With the new Mopar ignition system...and a good vacuum advance canister...it's running nice and smooth now.

Very happy again with the way things turned out!!​
 
Sept/23/12

Well I added a little piece of trim to the rear gate. A friend was parting out a 72 Newport and said I could come over and pillage before it went to the wreckers. Well I grabbed a bunch of misc stuff and then saw this little baby on the trunk. It's an old local dealer name plate....Lawson Oates Chrysler...Vancouver BC. The dealership is still around. Unfortunately it's chrome plated plastic...so I think it might be from the early 80's? Newport had a repaint and I suspect it was done when the car might have been traded in.

But regardless it's super cool and I just had to get it on the wagon....even if the wagon didn't actually come from there.

PICT6645_zps113466fb.jpg


PICT6646_zps2bc0271f.jpg
 
Oct 10/12

Well I've been working...slowly..on rebuilding an Auburn/cone type mopar suregrip unit...for the last couple years. I've actually had the suregrip unit for close to 20 years!! Anyway I got the cones machined down so they would not bottom out in the case, then used small washers to figure out what thickness of shim I would need to bring the lash back into spec on the spider gears.
Mine turned out to be .060, 60 thou. I luckily had some scrap stainless sheet in that thickness so I had my machinist cut me a couple shims. Then I reassembled everything. Next was to bring down my 3.23 open unit, and the suregrip unit, and have the two made one. I finished installing everything last night.

Took the wagon out for my errands today, and a good highway jaunt...to make sure all way well and lubed up. Then I found a nice deserted section of road and crank 'er up....car lite both tires up effortlessly and left two nice even black marks down the road....:icon_super:​
 
OCt 10/12

Also just got the cop car rims blasted....got these from Leaburn a few years ago...Thanks again!!
PICT0231.jpg


Will paint them and swap them onto the wagon very soon.

PICT6657.jpg
 
And now up to date....Today....

OK so been busy last few weeks working on the wagon. Trying to get a few things done before it goes away into storage for the winter and the Desoto comes home.

I suddenly developed a very bad tranny leak. I jacked up the back of the car for something...and I must have lost over a quart of fluid over night. Climbed underneath and found the leak...darn shift tower seal leaking!! So down to Napa to get the seals, new filter kit and fresh fluid. Dove into it and would have finished it in one evening...but I was so obsessed with finding a filter kit that had a neoprene gasket that I neglected to look at the filter it self. Turned out the A518 filter kit I decided on was from a late 90, early 2000 vehicle...so it ran the deep pan. The filter will not work on the earlier shallow pan of a 727. So next day I had to go out and russel up a proper kit. The kit I got had a moxed gasket...cork and rubber I think. Seems to be holding well.​
 
I finally finished getting the cop car rims primed and painted. I had six rims, so did them all and then picked the best 4 to put on the car. Checked each rim for straightness too. Mounted each rim on the back of the wagon, back end jacked up of course, and then used my dial indicator to watch for run out *** the rims turned slowly the the car in low gear. They were all in OK shape...none were perfect but good enough.

PICT6686.jpg


I then had to bring in my old rims and tires down to have them swapped around. The old ones were 15x6.5...so not a huge change going to the 15x7. Not a huge change visually, but just enough.

PICT6771.jpg
 
And now the biggie....Been working on my rear disc brake conversion. Really did not need to, but I had bought all the parts about 5 years ago and was getting tired of looking at them on the self. So figured why not give it a go. So the follow posts are my trials and tribulations.

First off the kit. I went with the Scarebird kit. I recieved their brackets, in bare metal...they now come cad plated. Anyway with teh kit comes a list of the parts to use.

- 82-87 Lincoln rear rotors
- 79-85 Caddy rear calipers and brake pads
- 79-90 Flex hoses

The rotors I had to bring down to the machine shop and have the center register hole opened up. I did this first adn assumed that the rotors would then fit onto the axles with no problems. Well I was wrong. Turned out that the holes for the studs to go through were not big enough to slip over the shoulder of the mopar studs.

PICT6689.jpg


PICT6691.jpg


PICT6690.jpg


PICT6693.jpg
 
So back down to the machinest with a spare axle, the original drum and the rotors. He machined out the stud holes to fit over the shoulder on the studs and all was good. Cost me $20 total to get all the machine work done.

So now it was rear diff. disasseble time. Removed the rear wheels, disconnected the rear brake line, then pulled out all the brake hardware, and then finally had to pop out the E-brake cable. Now not sure if you know of this littel trick or not to get the cables free from the backing plates. Can't remember where I saw, heard or read it, but it works fairly well.

You need a small hose clamp and a screwdriver....Put the hose clamp over the end of the E-brake cable and clamp down...leaving the clamp about 1/4" away from the backing plate. The keep tightening it until all the littel prongs are pressed inward enough for the cable to pop through the backing plate. Might need to adjust it's position a few time to get it to sit just right and compress those littel tangs...but it will work.

PICT6703.jpg


PICT6704.jpg
 
After the E-brake cable was removed off then out came the axles, and off came the backing plates. Good thing I did the swap...the inner axle shaft seals were toast and had washed out almost all the bearing grease. SO I had to buy a couple new seals and install them first, then re-pack the axle bearings.

PICT6705.jpg


Scarebird bracket....

PICT6706.jpg


Axle re-installed....

PICT6707.jpg


Rotor installed...held in position with a coule nuts...

PICT6709.jpg


And finally the calipers and pads installed over the rotor...

PICT6712.jpg
 
In the instructions that came with the kit it tells you how to order "custom" E-brake cables...well I'm far to cheap for that. So I was looking at things and figured I might be able to make the stock cables work....with a little customizing.

First I put the cable into the back of the caliper where the e-brake is supposed to hook up...was very close.

PICT6745.jpg


Figured all I needed to do was open up the hole just a hair to get the cable to pop in just like it did in the original drum brake backing plate. So off came the calipers, and out came the rat file. Few minutes work had the hole opened up.

PICT6716.jpg


The I had to remove the return spring that was on the ends of the stock E-brake cable...this job sucked big time!! And even though I was wearing leather work gloves I still ended up with blisters on my hands and fingers. I would also recommend that you wear safety goggles too, since that spring steel when cut shoots off at a very high velocity. Had a couple pieces stick into my forehead!!

PICT6743.jpg


And then installed....Perfect fit...almost....

PICT6744.jpg


The RH side fit perfectly, but the LH side was about 3/4" short....So I had to come up with another plan of that side.
 
So after finding out that the E-brake cable was too short I tried to figure out what application might have a longer cable. Went on-line, and to RockAuto. There I was able to cruise the mopar cars, trucks, and vnas until I came across a cable that was close. A 89-95 Dodge ram van had a cable cae about 5" longer...perfect. So out the wreckers I went hoping. Turned ou thtey had only one...so I pulled the cable...it was not moving very well but figured I might be able to free it up.

So home with my cable, soaked it in used tranny fluid for a few hours, then began to work it back and forth....the cable evntually stripped off the plastic coating on the cable and then got all bound up...useless. So on to the next plan. I went out into my shed....and stared looking around. Turned out I had another RH e-brake cabel from some car. So back to the garage ad see if I can make it work.

I was able to route the longer cable cleanly up, over and around and then into the LH caliper....Sweet!!

PICT6749.jpg


PICT6748.jpg


PICT6750.jpg
 
OK so now comes the really fun part. The instructions that came withteh kit said to cycle the E-brake a couple times to get the piston to move up and the e-brake to set properly. You needed to do this "before" any brake fluid. So I did just that and nothing happened. There was almost no E-brake. Messed around a bit more and could not get it to work right. So back to the internet and start searching.

Turns out these Seville rear calipers have quite a reputation....and not always the best either. So many hours of researching netted me a couple choice pieces of info..One site said to remove the rear spring, then the big nut, and then use a 14mm wrench to sping the piston out and into position. Then re-install the e-brake lever and you'd be good to go.

So decided to try this...Remove spring...

PICT6751.jpg


PICT6754.jpg


Then remove big nut...11/16 wrench...

PICT6755.jpg


Then use the 14mm to tighten up the piston....turn it towards the front...where the e-brake cabel comes through.

PICT6758.jpg


Ok so went through this and it did move the piston out closer...but there was still way to much slop in between the piston and the pads/rotor.
 
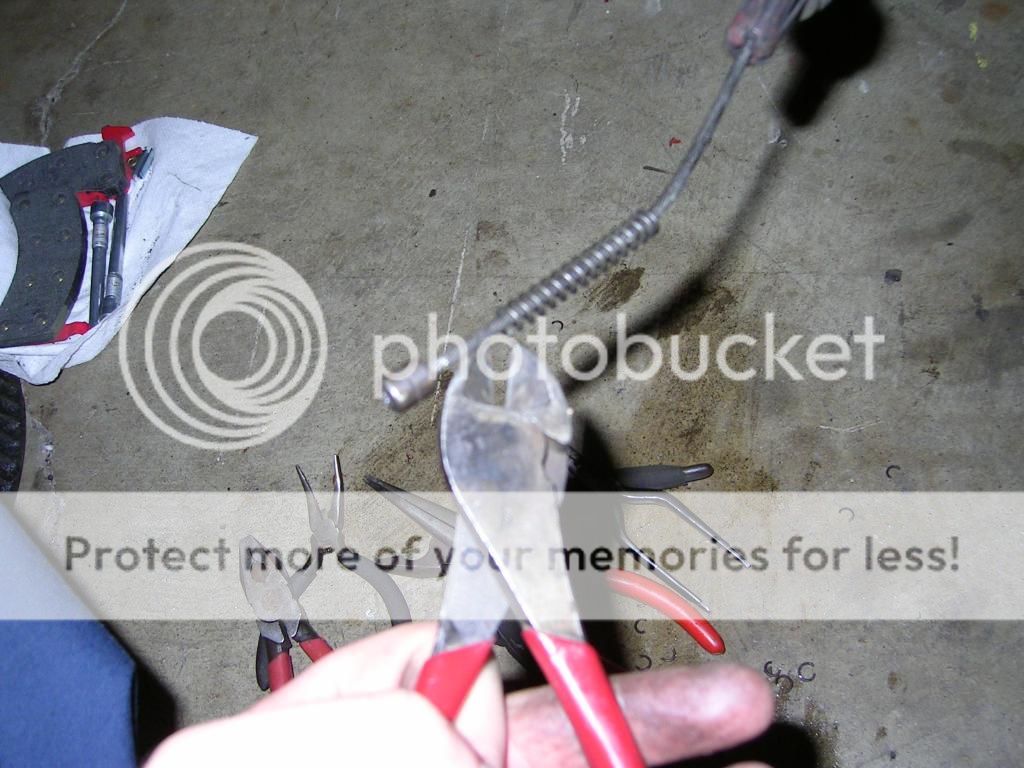
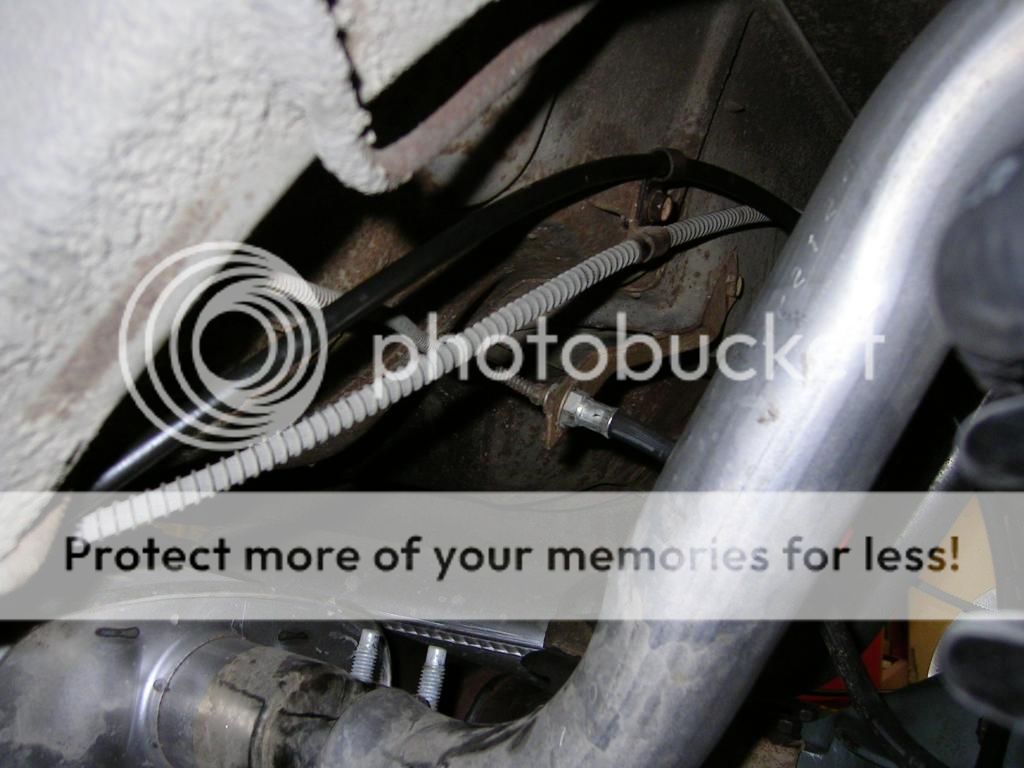
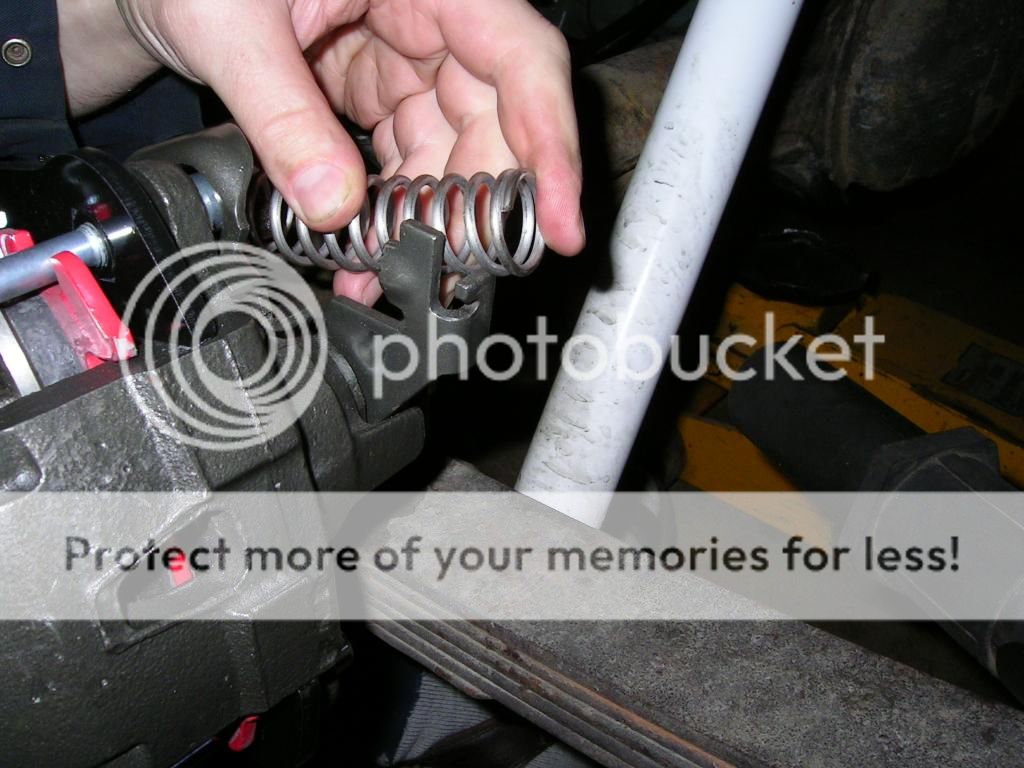
So back to the internet. This time I found a factory GM service update on how to adjust the rear E-brake. It said with the e-brake cable removed, and spring re-installed, that you had to push it forward and then let it go so it would "snap" back. This snapping would then cause the clutch to ratchet up the piston and get the proper 1/4" movement in teh e-brake lever. Only problem was it could take anywhere from 30-100 of these "snaps" to get things in place.

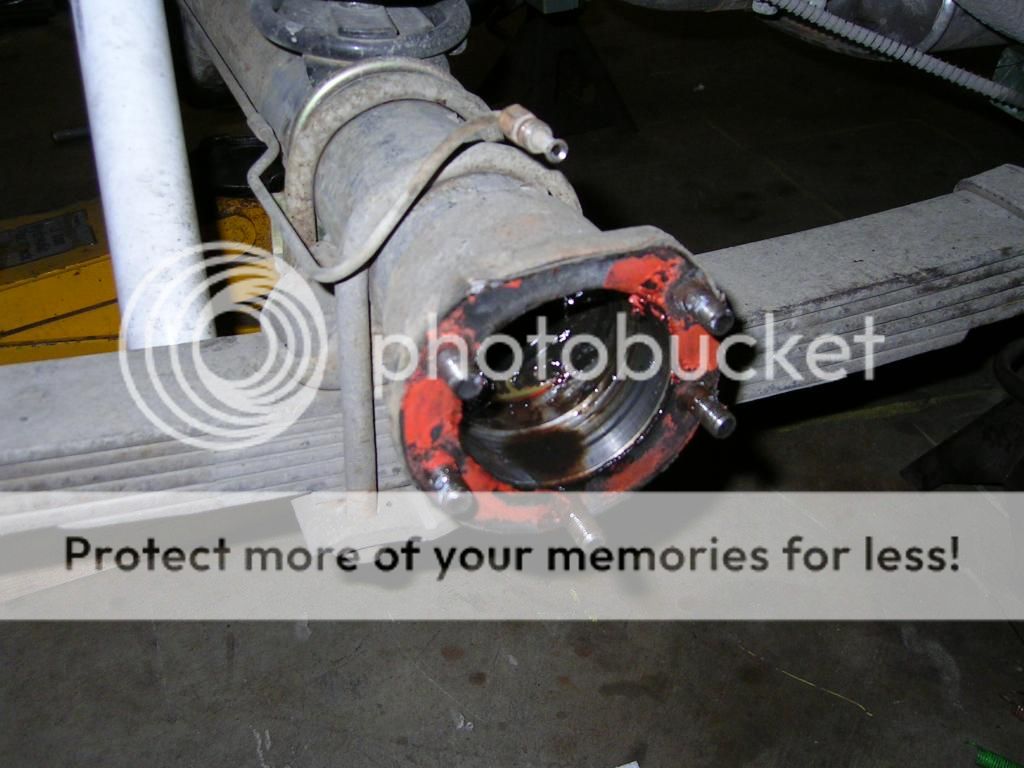
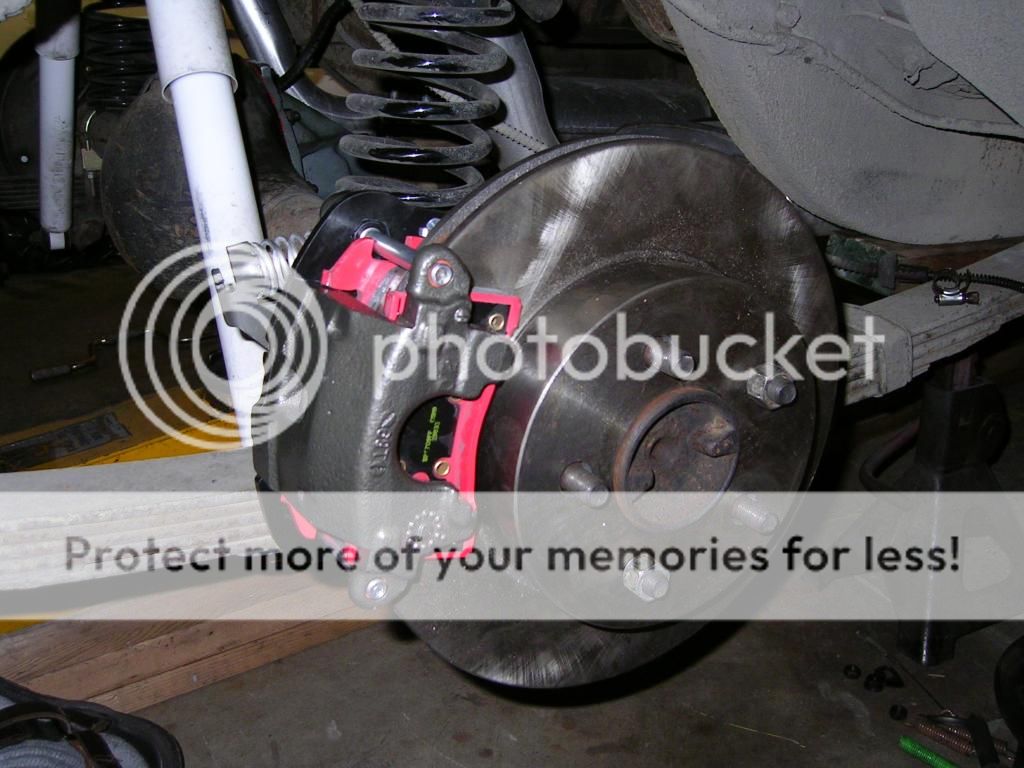
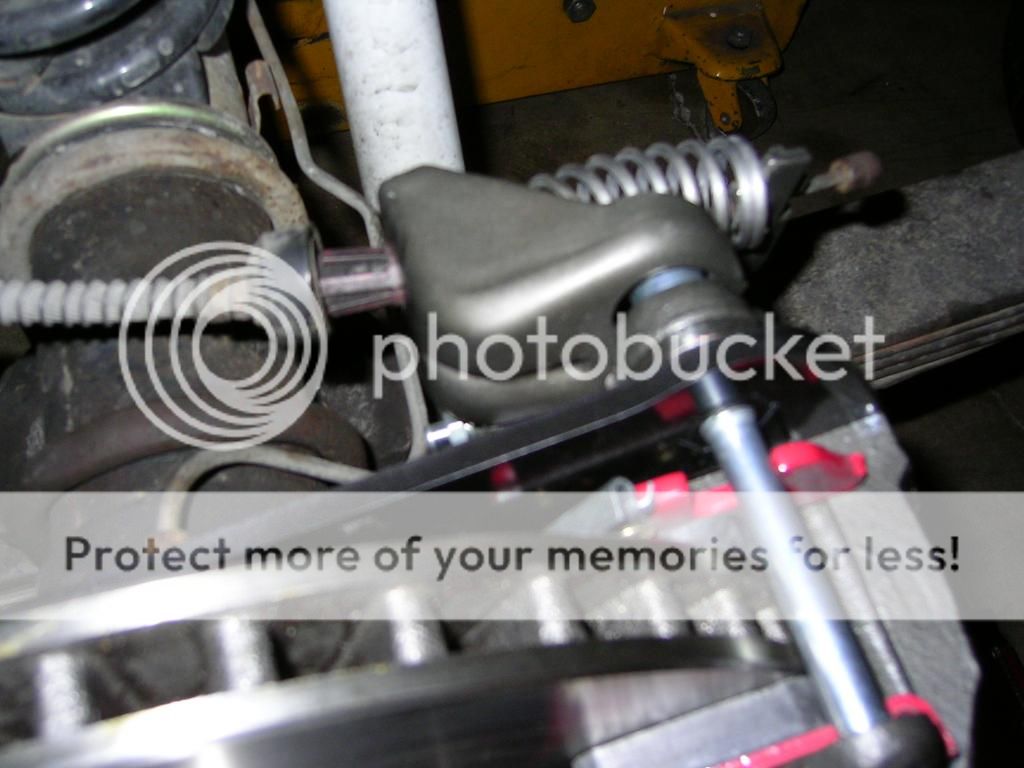
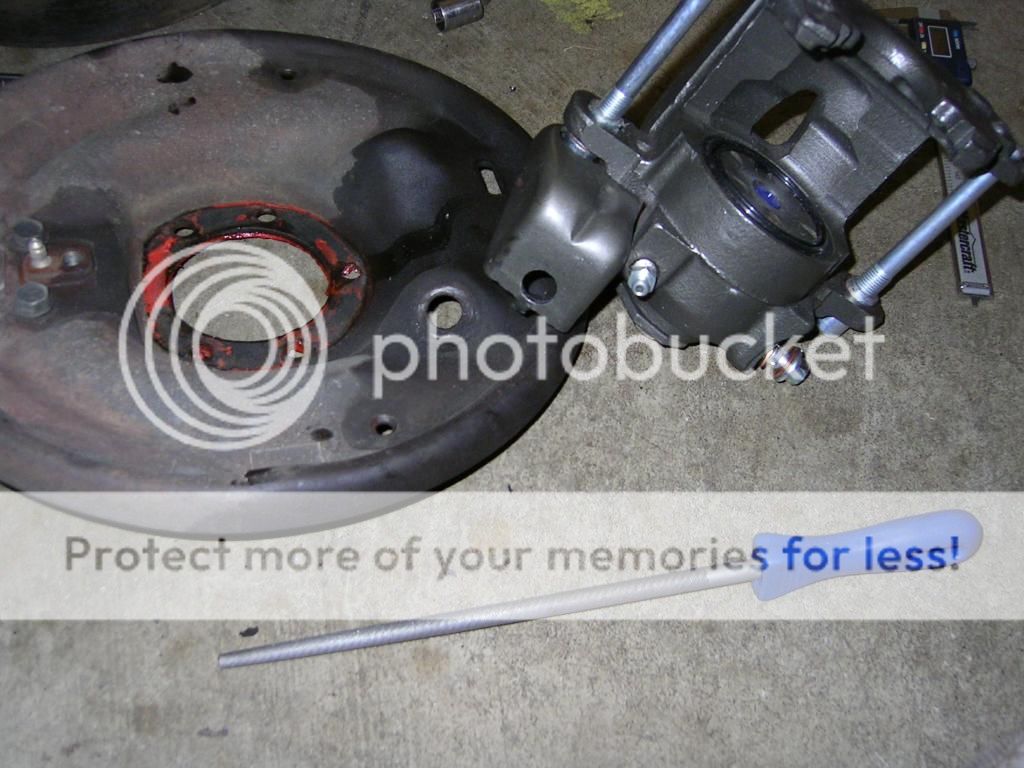
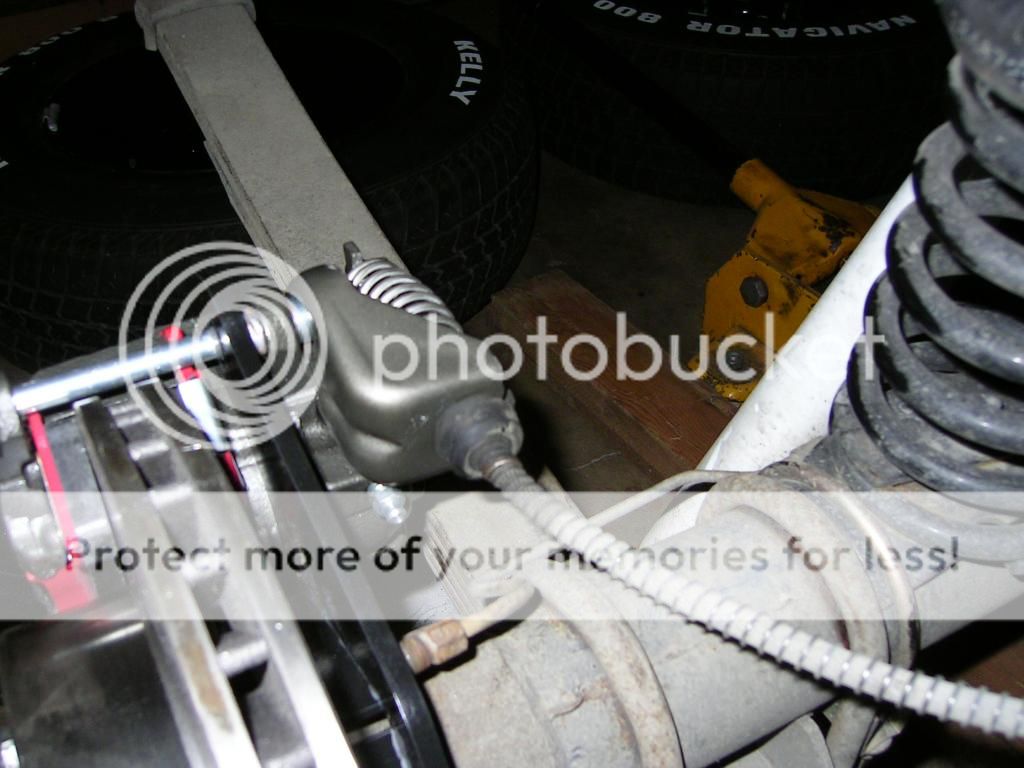
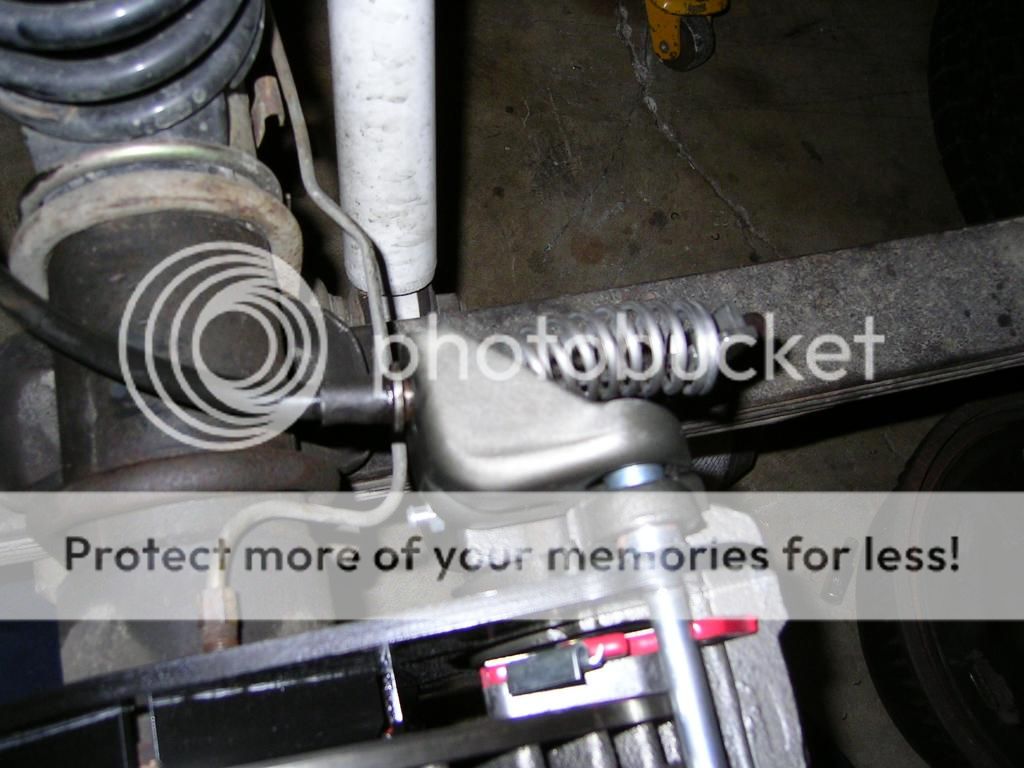
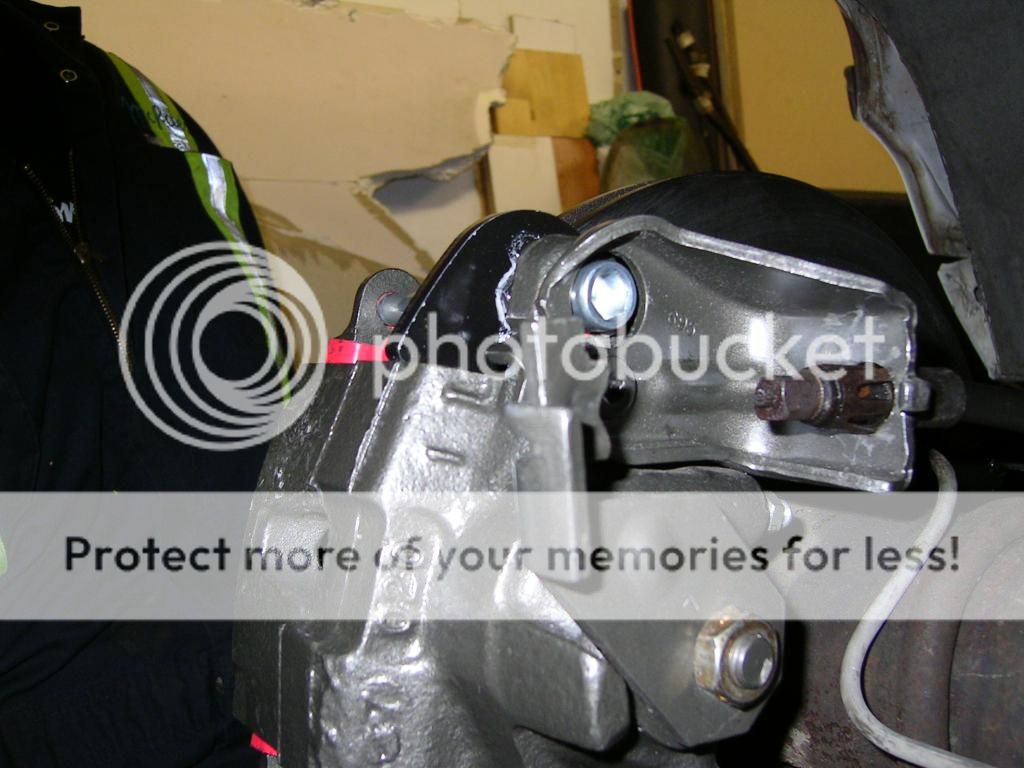
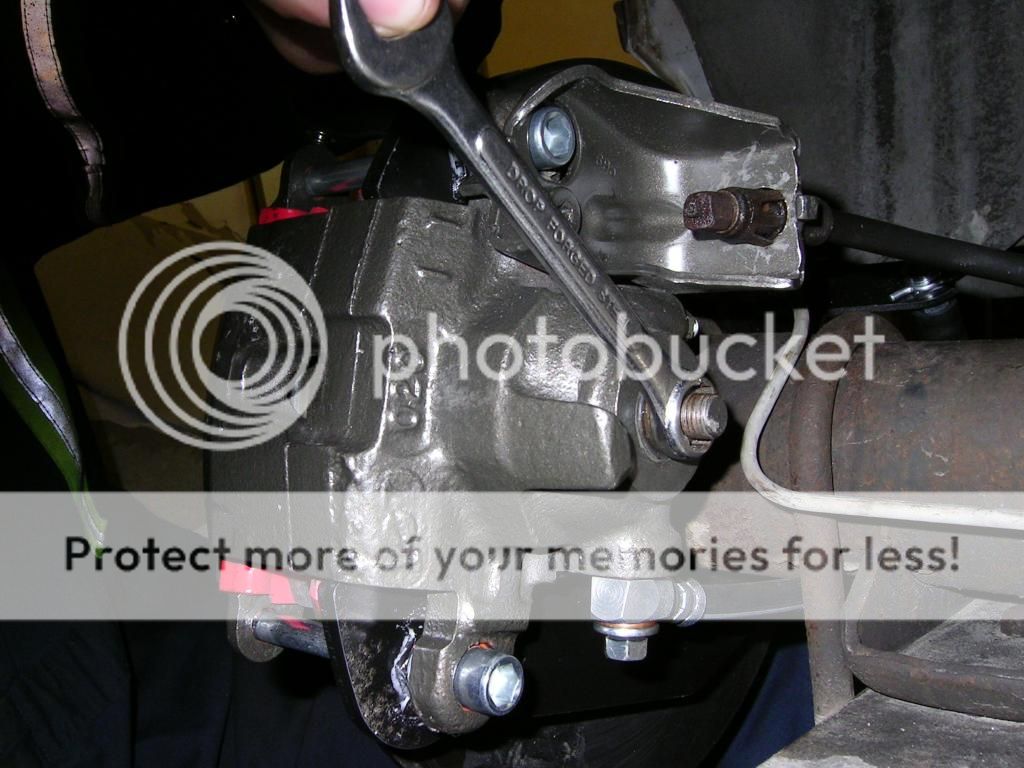
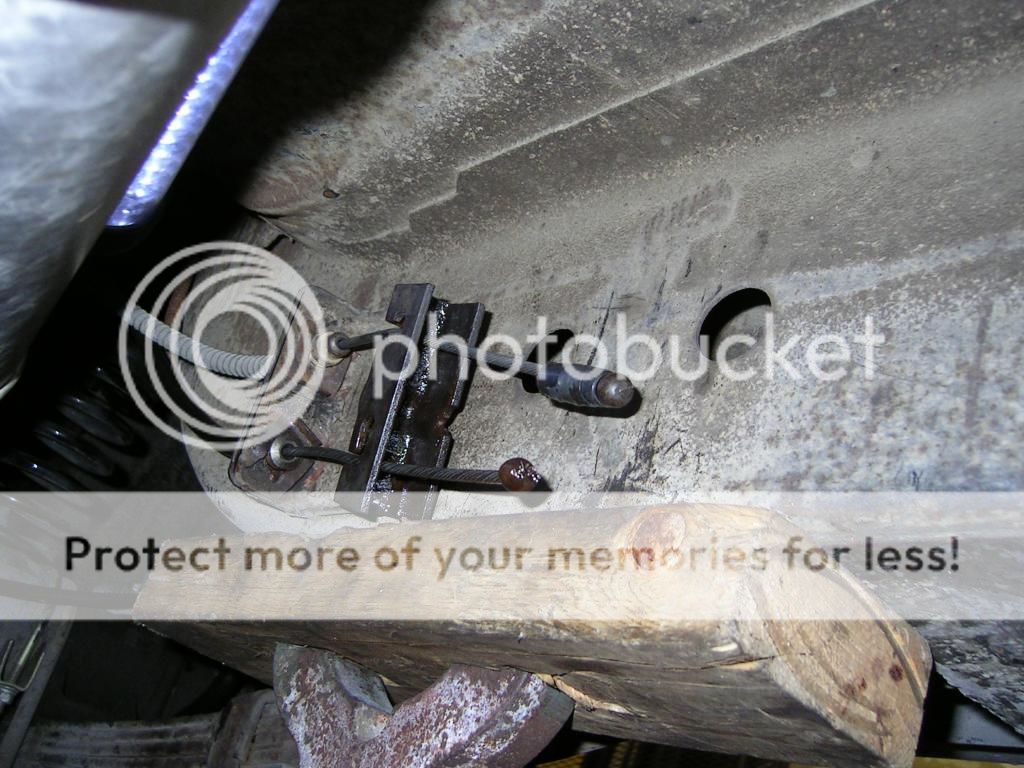
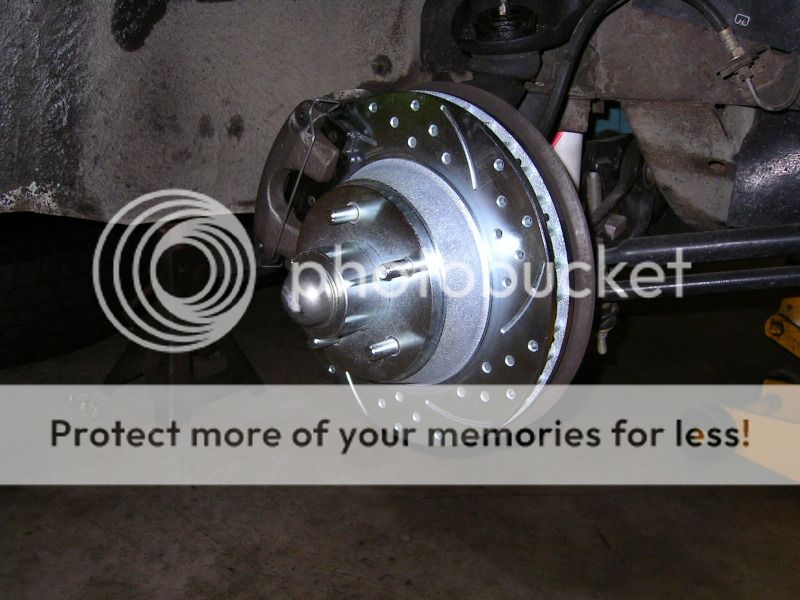
So back out to the wagona nd tried this....it seemed to work on the RH side...but just wasn't quite right. LH side...nope, nada...was not working. By this time I was about ready to pull everything, drop it in the dumpster and put the drums back on. I was sittign there looking at hings when a thought came to me...what if the calipers were binding up? So I decided to pull the caliper and check all the mounting points.


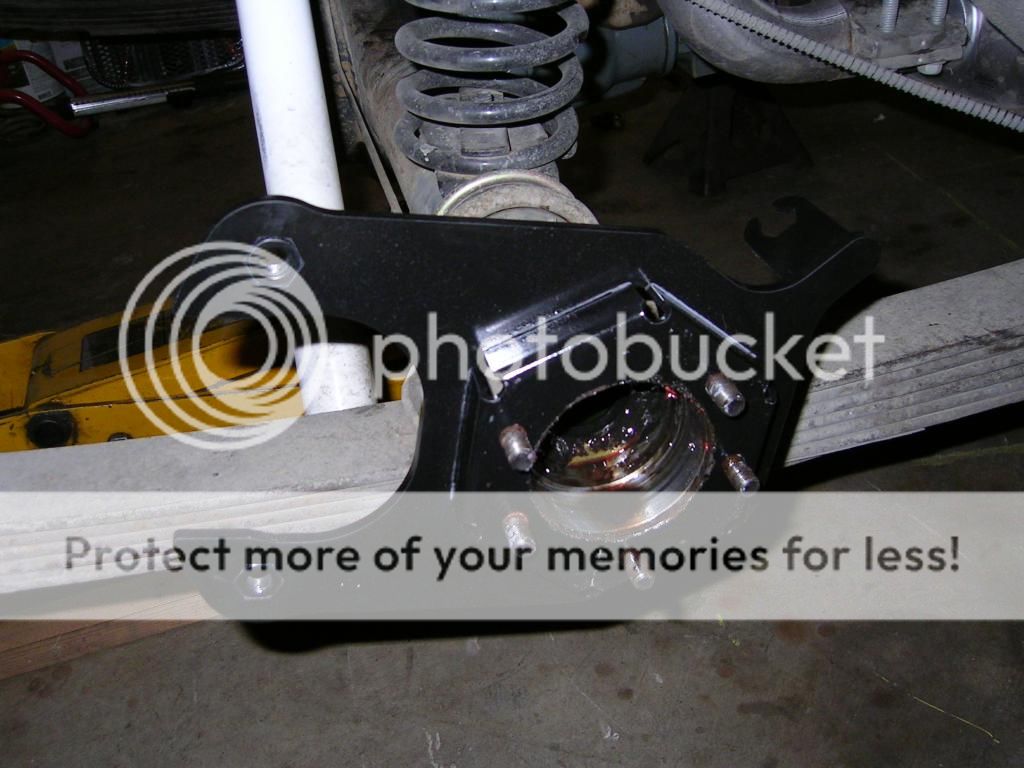
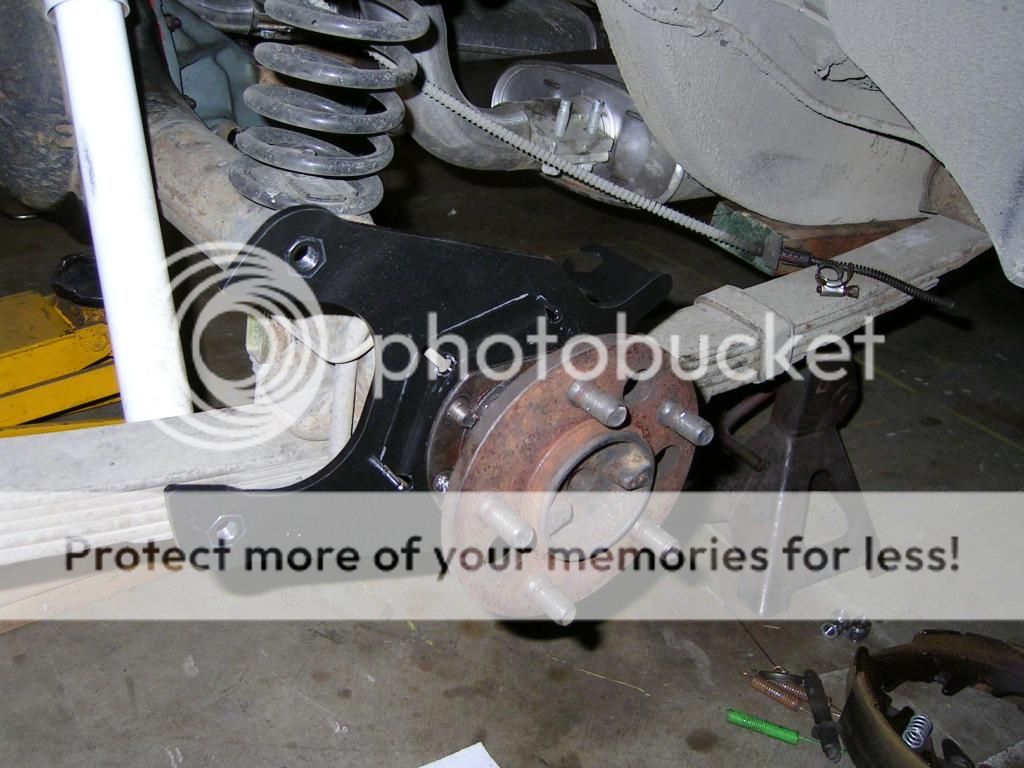
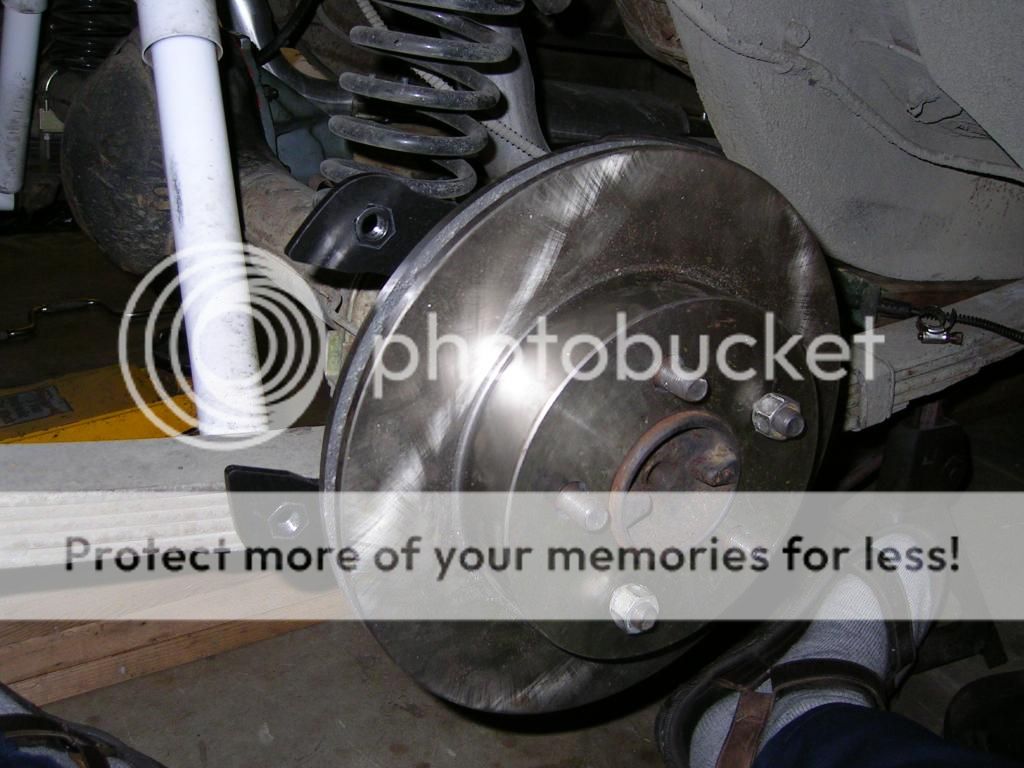
Turned out his was one of my major problems. I had primed and painted the scarbird brackets, as well as the calipers had a heavy coating of paint on them as well. So out came the sand paper, some never seize and then re-install. This time everything ratched up properly...I had the 1/4" movement for the E-brake levers and all was well!!
 
So now I had to deal with longer E-brake cable ends under the car. For me this was not such a big problemsince when I go the car the forwrd e-brake cabel had been cut. so I pieced it together with a chnk of rear cable from a parts car. A couple good cable clamps had everything working. So now all I had to do was loosen the cable clamps, move the rear section of cable forward, and tighten things back down.

But beofre I could do this I had to modify the clamp that holds the two brake cable ends. Beause I was now using two RH side cables (with large ends), and the stock clamp has one small hole (LH side) and one large hole (RH side) it would not work with the two RH cables. When I was at eh junkyard for the van e-brake cabel I grabbed the clamp off the van knowing I would have to do this modification.

PICT6746.jpg


Now with the smaller hole opened up....

PICT6747.jpg


But then I discovered that the two cable were slightly different in length...so it was not pulling the e-brake lever evenly. So now I had to either lengthen the shorter cable....or shorten the longer one. Took me some time to come up with a solution for shortening the longer cable. I finally found a piece of metal inone of my scrap bins and was able to cut a small piece, then cut a groove down the middle for it t pop over the cable.

PICT6759.jpg


Then install it with a few wraps of tape to make sure it doesn't come loose.

PICT6765.jpg
 
Back
Top