MrMoparCHP
Old Man with a Hat
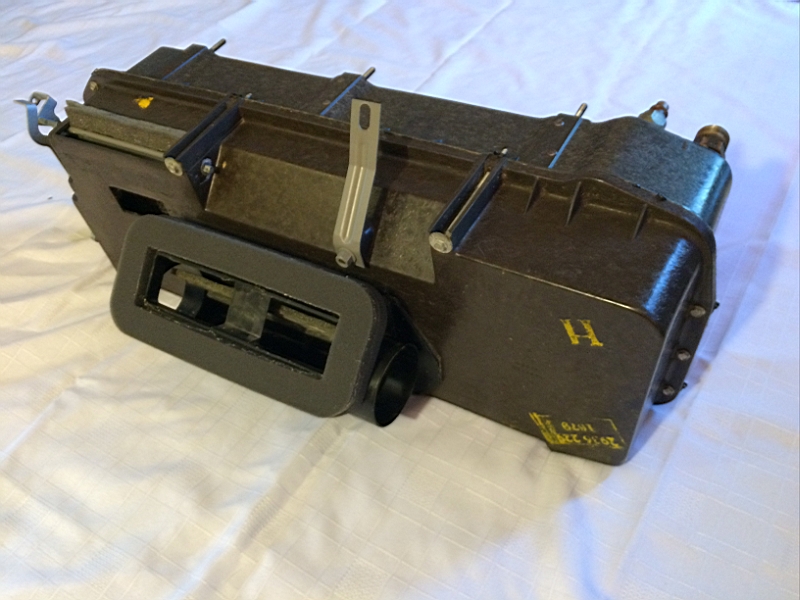
Two years ago I started on the heater/AC box and I just now finished it. Initially I was waiting for DMT to make the foam kit, then I was waiting for the heater core to be inspected. In July I sat down to start the assembly and hit yet another delay, the evaporator. I was given a new evaporator by a friend so didn't see it to be an issue. This pieces was poorly made, the two fittings were off the correct place by about 1/2" and didn't protrude through the box enough. So I took the two used ones in to be inspected, after another wait I got the passed pieces back.
The evaporators on the 69 have one of the mounting studs and both of the ones I had were broken so I ground off the back and replaced it with a bolt and JB weld to hold it in, another day delay. Put the evaporator in the case and secure it with the four screws. On to the heater core, glued the seal to it and let it sit over night. While I waited for that I added the foam to the doors on the other half the case and started looking at the linkage for the actuators. From the beginning I had two complete boxes and some spare case pieces. I already knew the linkage on the two I started with were different and I tried both to see which one seamed to work more smoothly, it looked like the design was flawed and they were trying to make it work better, (a 72 unit I have is yet again different).
Needless to say I settled in on a set and cleaned it up. The next day I sit down to get thing assembly together and get the heater core in and put the other half the case on and secure it with all the bolts. Looking like it is ready to put in the car I got my die out and went to clean the stud the hangs the assembly under the dash... crunch, it rips out a chunk of the case!
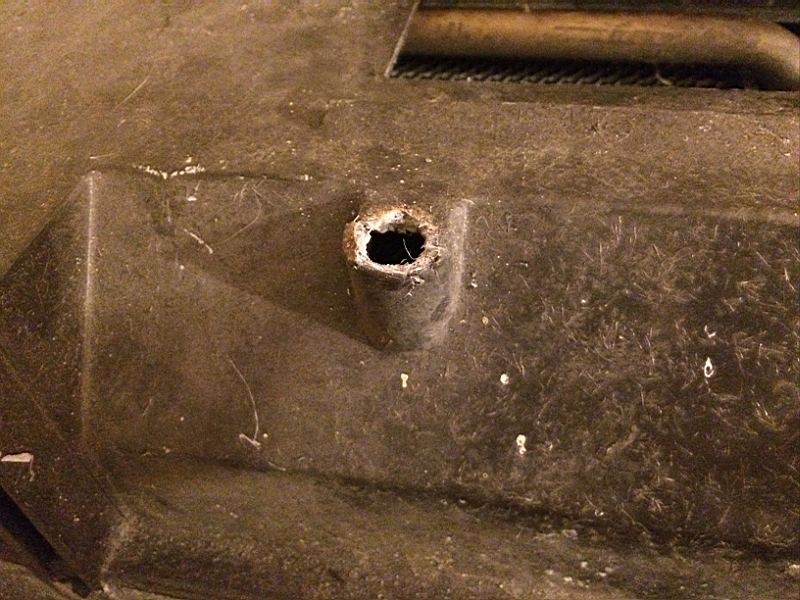
Dang! So I grab another case half that I had sitting there and inspect it, looks solid so I first remove the stud (bolt) and run the die over it a few times and put it back in, backed it up with JB Weld. While that set I pulled the cover off the completed assembly and stripped the doors off of it, I wasn't happy with the treads on one of the doors so I found another but the shaft was about 3/32" longer, nothing a little grind wouldn't take care off. Good thing I had some spare foam as the ones from the kit were already used. Once again I assemble the cover and bolt it down just to realize I forgot the stud for the linkage, I managed to fish it in through the resistor hole that was still off.
The evaporators on the 69 have one of the mounting studs and both of the ones I had were broken so I ground off the back and replaced it with a bolt and JB weld to hold it in, another day delay. Put the evaporator in the case and secure it with the four screws. On to the heater core, glued the seal to it and let it sit over night. While I waited for that I added the foam to the doors on the other half the case and started looking at the linkage for the actuators. From the beginning I had two complete boxes and some spare case pieces. I already knew the linkage on the two I started with were different and I tried both to see which one seamed to work more smoothly, it looked like the design was flawed and they were trying to make it work better, (a 72 unit I have is yet again different).
Needless to say I settled in on a set and cleaned it up. The next day I sit down to get thing assembly together and get the heater core in and put the other half the case on and secure it with all the bolts. Looking like it is ready to put in the car I got my die out and went to clean the stud the hangs the assembly under the dash... crunch, it rips out a chunk of the case!
Dang! So I grab another case half that I had sitting there and inspect it, looks solid so I first remove the stud (bolt) and run the die over it a few times and put it back in, backed it up with JB Weld. While that set I pulled the cover off the completed assembly and stripped the doors off of it, I wasn't happy with the treads on one of the doors so I found another but the shaft was about 3/32" longer, nothing a little grind wouldn't take care off. Good thing I had some spare foam as the ones from the kit were already used. Once again I assemble the cover and bolt it down just to realize I forgot the stud for the linkage, I managed to fish it in through the resistor hole that was still off.