MrMopar's 1969 California Highway Patrol restoration

Gulp! Wow, that is true dedication. Hats off to you Alan! As always, blown away by the lengths you have taken to restore this car as absolutely amazingly accurate as you are.
 
For those who want to know what cam was used.
It is a Comp Cams 21-305-4

ADV: INT-268 EXH-276
DUR @ .050: INT-222 EXH-226 LOBE SEP: 110.0
VALVE LIFT: INT-.464 EXH-.464

That is the info on the box.


From the Factory Service Manual

DUR @ .050: INT-268 EXH-284

Didn't see other numbers.


Alan
 
My friend that helped put the engine together came by today to look at the dash pad and the steering column assembly, and he asked what was needed to fire up the engine.
I told him he would need to tell me so we looked it over and in minutes we were working on it. We had to bypass the heater and jumper some power and grounds. Our first click of the remote switch we just got clicks, while we were looking over all the starter connections we noticed smoke coming out of the switch, removed it and through it in the trash.

Now just clicking a couple terminals together we got the engine rotated to TDC and then put the distributor in and all the plug wires. Now I have never worked on a Big Block so it took a little to figure out how to get at the number 7 plug. Also fishing three wires under the AC compressor to a little work.

With everything hooked up a gas can was placed at the back of the stub frame and connected there. Gas was pooed into the carb vents, another check on all the connections and we were good to go. After a few tries we got it to run and put it through all the breaking motions.

All in all it was a good day for an accidental running.


Alan


[video]https://youtu.be/YldAWTLXo50[/video]

For some reason YouTube has the audio muffled/turned down

here is a link to the file on Facebook
https://www.facebook.com/Like.Mr.Mopar/videos/997344840318252/?permPage=1
 
I have been waiting to put the hood on till after we fired it up, there is still no grill or bumper on the front, that gave us easier access to work on it.

Now that that is done I need to first get the wiper assembly back in as it will probably be easier with the hood off and windshield out.

Then I can get a couple friends over to help get the hood on, then I can align the fenders and finish off the front.


Alan
 
I recently finished up the assembly on the heater/ac box covered in another thread.

2015-10-31_004.jpg


That being done I moved on to putting the firewall insulation in the car, this car uses several different pieces.

2015-10-31_009.jpg


I needed to get the oil pressure line into the interior so I ran it through one of the firewall insulation nails, a convenient way without needing to drill a hole and it doubles as a grommet. A nifty trick for getting wire through also.

2015-10-31_007.jpg


Alan
 
Last edited:
I really like the way you ran your oil line. I would not have thought of that.


I recently finished up the assembly on the heater/ac box covered in another thread.

2015-10-31_004.jpg


That being done I moved on to putting the firewall insulation in the car, this car uses several different pieces.

2015-10-31_009.jpg


I needed to get the oil pressure line into the interior so I ran it through one of the firewall insulation nails, a conveniant way without needing to drill a hole and it doubles as a grommet. A nifty trick for getting wire through also.


Alan
 
I really like the way you ran your oil line. I would not have thought of that.

Neither would I, it was my engine guys idea. He came over to fire up the engine for the first time and mentioned that.

The gauge will go on the side of the steering column in a pod.

The gauge inth picture was in he ac box opening so he could see it while the engine was running.


Alan
 
With the AC box done i was able to get some work done. The box was put in place then the recirculating air duct followed up by the engine side housing.

2015-11-04_003.jpg


2015-11-04_005.jpg


2015-11-04_006.jpg


Not much room behind the engine to tighten nuts, having the windshield out was a big help. With this done the wheel liner was put in and after fighting to get it in and lined up I noticed that it bight have been easier to put the heater hoses on first. The hoses were not an issue just a little reach from under the car.


Alan
 
The grill went in next with no issues, I did replace all the studs.
2015-11-07_001.jpg


Once the grill was in I was good to put the bumper on, normally a two person job I was able to get it in place and bolted in.

2015-11-07_003.jpg


Alan
 
Last edited:
Over the weekend I had a friend over to help on the car and called another over just to help with the hood.

2015-11-07_005.jpg


The hood took about 1-1/2 hours to get aligned, between moving the hood around and moving hinges we got it, although I was happy with it after about 20 minutes.

Before we cleaned up we test fitted the push bar assembly that I had made, it is a copy of a genuine 69 CHP bar. The holes in the frame lined up perfectly, the braces on the top of the bumper will be added once the car is done and the ride height is finalized to position the bar square to the road.

While my engine builder was there to help with the hood we ran the engine some more during which we had to replace the starter that was stuck on.


Alan
 
When you did your exhaust system, did you replace the mufflers? If so, what brand/size?
 
As always work continues, after I got the grill and bumper I realized I didn’t put the air dam in. I looked to see if I could fish it in and I didn’t see a way without taking something apart. I thought it’d be easier to remove the latch assembly and drop the air dam in, good thing it was plastic as I needed to flex it a bit to get it in. With the limited space to get the different screws in and now more restricted access to put the latch assembly in it might have been better to pull the bumper.

2015-11-15_002.jpg


2015-11-15_003.jpg


2015-11-15_006.jpg


The front turn lights were blasted on the outside using some old lenses to protect the inside, the lenses were left on for painting.

2015-11-21_004.jpg


2015-11-21_002.jpg


2015-11-21_001.jpg


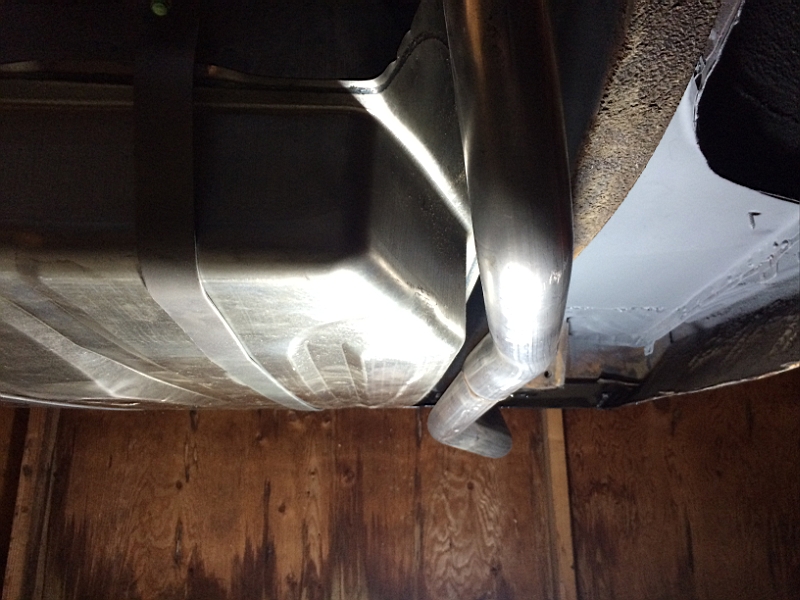
The belly of the car was painted with a rust encapsulator (Rust Bullet) and the gas tank put in. On the driver side where the flange was bent up for exhaust clearance needed to be bent up some more.

2015-12-04_002.jpg


It took a while but the correct bracket was acquired for the fire extinguisher along with the correct model extinguisher. Using the original trunk matt as a guide and one original mounting hole it was screwed down.

2015-12-06_001.jpg


2015-12-06_002.jpg
 
Last edited:
The engine and headlight harnesses were installed and I started in on the CHP wiring with putting in the correct style tubing and clamps in the original holes.

2015-12-07_001.jpg


2015-12-07_002.jpg


New brake lines for the differential were acquired but differ from what was on the car, they were sent back to Inline Tube along with the originals.

Work continues.


Alan
 
Back
Top