I have used a piece of fuel line and made a new one, something I had in the toolbox.
Alan
How exactly did you do that? ha its hard for me to imagine.
I have used a piece of fuel line and made a new one, something I had in the toolbox.
Alan


I never had a rear drum stick to the "register" snout on the axle, but I never lived in an extreme rust area. You could rub anti-sieze on the snout and the base of the wheel studs, or maybe Rustoleum rust preventer spray (similar to cosmoline wax). The main problem is usually having to back off the shoes with brake pliers thru the rear slots on the adjusting wheel. If not, you usually can't pull the lip on the drum past the shoes.
Re packing front wheel bearings. After forcing grease into the rollers, I fill the hub with grease and pack a bit in the dust cover, with just a little air pocket so pressure doesn't build up.
64.................Since your 1966 should be in the same family as my 1965...
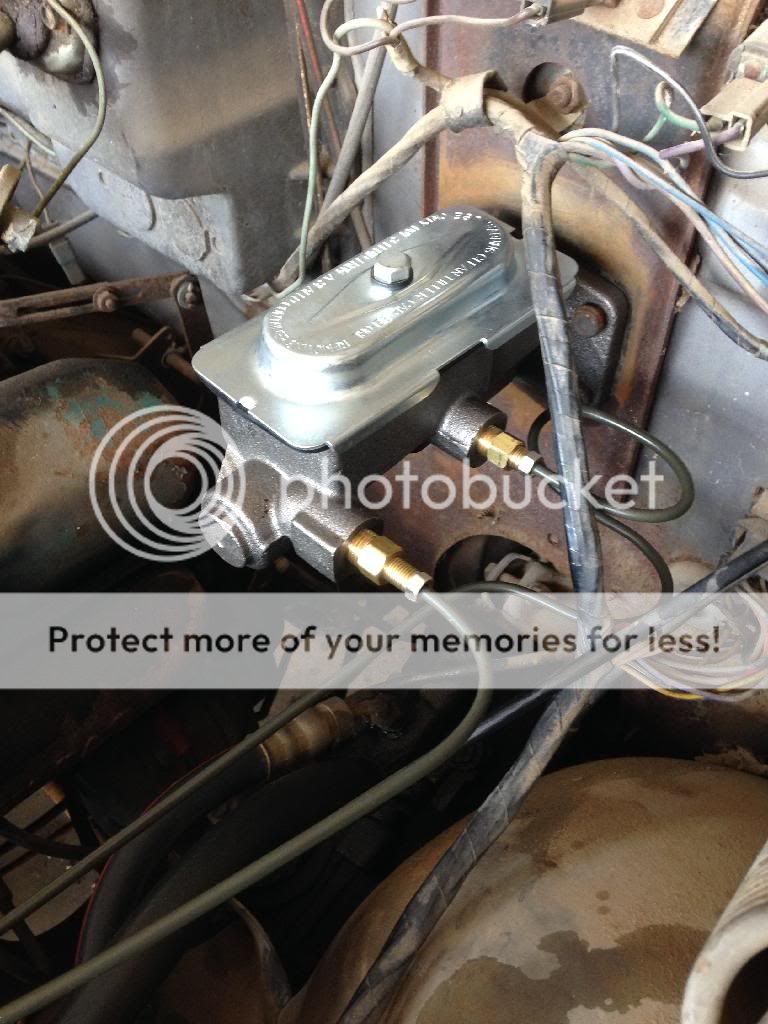
I'm in the process of replacing my single port MC with a new dual port.
Since I am staying with the drum brakes, does it matter which port I use for front and rear brake lines?
This is a MC for 4 wheel power drum brakes so, since there is no proportioning valve, does it matter how it's tubed up?
With disc brakes, the rear reservoir for the front brakes is usually much larger than the rear one.
The reservoirs in the MC are almost the same size. The rear reservoir may be slightly larger than the front but not much.
I'm just curious what you guys think since you know MUCH more about these cars than I do.
:yes_no:
Yes, the two ports are different sizes. The front is 9/16"-18 and the rear is 1/2"-20.The fittings should be different size. The front brakes are typically on the rear port. I was once told that is was in case of a master failure you would still have front brakes.
Alan

Yes, the two ports are different sizes. The front is 9/16"-18 and the rear is 1/2"-20.
I went ahead and tubed it up rear port to front brakes and the front port to rear brakes.
I got the leaking wheel cylinder replaced and all I lack is bleeding the system.
I'm looking forward to a nice long drive when it's finished.
I love driving this car. It's so smooth and quiet with great power.
It's just fun to drive it and it gets lots of looks, too.
Weldon
P.S. This is the final result of the installation.
I went for a drive today after I finished bleeding the system and washed the car.
Everything works great.
View attachment 23518

any leaks using the line adapters to the MC? you got the 3/16 line fitted with 9/16 and 1/2 adapters?
heres the route I went after following advice about possible leaks.