How to rebuild Chrysler Power Window motor clutch assembly

Mr C

Senior Member
Joined
Nov 20, 2012
Messages
4,537
Reaction score
4,454
Location
All over
How many times have you hit the window switch only to see the window wiggle or struggle or only move after a time delay from when you hit the switch?...all are symptoms of "clutch" failure (or pucks, whichever you prefer) you hear the motor making noise, but the window doesn't move.

I, like many Mopar enthusiasts have been through this more than a few times. I've bought the replacement pucks only to have the motor fail again a month later. Upon relection this only makes sense, since the pucks are plastic, have been sitting in a bag somewhere and are almost as old as the original pucks that crumbled.

I thought everybody knew how to rebuild the clutch (or gear head) on the power window motors, but I had a request to post a "how to" so I will do my best. The pics were taken with my "shop camera" and some aren't the best.

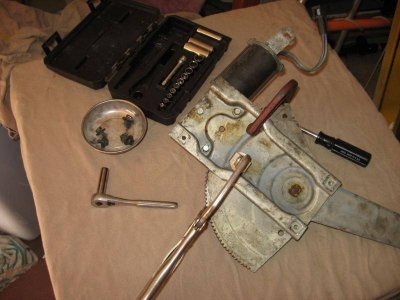
This how to begins after you have wrestled the regulator out of the door of your car and then unbolted the motor from the regulator.

Note: I did not lube up the assembly as much as you will need to so that you could see what I was doing.

The victim: You standard Mopar power window motor:

motor 001.jpg
 
Disassembly :

Remove the phillips screw holding the clutch cover in place.

Next pry up on the outer case...it may be stubborn to get off...

Okay...this is what you'll likely find...the puck on this motor were totally pulverized the grey chunks here are whats left of the pucks

motor 003.jpg


motor 004.jpg


motor 005.jpg


motor 006.jpg
 
Next pry up on the gear head...I will likely be stubborn too. You may need a little penetrating lube around the shaft.

Now it's time to clean your parts...it will be full of old grey grease contaminated with the plastic shrapnel that was once the pucks.

motor 009.jpg


motor 010.jpg


motor 011.jpg
 
So, what to replace the pucks with? The old pucks are just as brittle as the stuff you had and will fail in short order.

Here's what to buy- hardware store nuts...they are metal, will never fail, and work perfectly (a 7/16 socket fits these in case you're wondering). Depending on the brand you may need to shave off a bit of the points on the nut to get a bit of clearance with the gear head...there needs to be a bit of play once its assembled the outer clutch and the gear need a little give to them...like a sixteenth to an eighth of an inch movement.

Not much needed to come off these nuts ...a little work with the bench grinder and I'm ready to reassemble.

motor 017.jpg


motor 012.jpg


motor 013.jpg
 
Now assemble the nuts in the outer clutch...two per end. Use grease to "glue" them in place.
Remember to use a lot more grease than you see here.

Insert the gear head into the outer clutch.

Put a dab of grease on the shaft and grease the housing well before replacing the rebuilt clutch.

motor 020.jpg


motor 021.jpg


motor 022.jpg


motor 023.jpg


motor 024.jpg
 
Place rebuilt clutch.
Ensure it's well lubricated between the outer clutch and the threaded gear in the motor housing too.
Replace cover with the Phillips screw.
You're done...better than new!

Note: You should be able to grab the gear and hmove it a bit after assembly..as mentioned sixteenth to eighth of an inch play is enough.

I hope it was useful.

motor 025.jpg


motor 027.jpg


motor 029.jpg
 
I don't have power windows.. As long as the arms are working, my windows will be down. However, thank you Mr C!! Really appreiciate your info, and sharing on the board! Youve always got great post to share.

Hope this helps someone.
 
In all my years, I have never seen anyone do a how-to on window motors. You, Mr. C, just did the C-body world an incredible favor. Thank you!

< Sent from my tablet >
 
Amazing and very simple, who'd have thought? I am about to have an abundance of working power window motors and will replace the one in my driver door for what might be the last time! Thanks Mr C.
 
I just utilized your clutch rebuild tutorial and it works like a champ!

THANK YOU for sharing.

:yourock:
 
Yup, I love cheap fixes that are better than new. Glad it worked for you.
 
I just pulled out my box of motors not 2 hours ago, I've got 6 I can do!
 
Yep, I lubed up the tracks on the window regulator and ran the window up and down a couple of times and the fix works great! Thanks again!
 
I hope you guys don't mind my adding to this thread. I used this method this afternoon, and it worked great. I have nothing to add to the motor rebuild other than positive feedback.

The only thing missing for me was that I'm new to this, and I didn't know how to get the motor out to get to the point described above. Here is how I took out the motor and regulator, in case someone else comes along and wants a basic tutorial.

First, remove the door panel. There are several instruction sets out there, and I won't repeat them here.

When the door panel is off, lower the window so that you can see the bottom of it in the service opening. Once you have done it once, you can probably do it easier with the window up, but it's nice to see what you're doing. You can move the window up by hand once the regulator is unhooked.

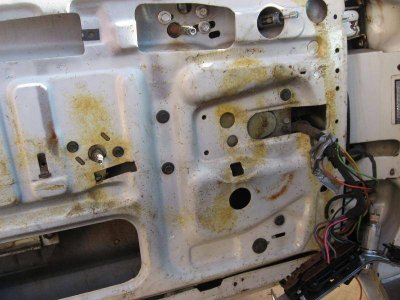
Remove the three bolts that hold on the regulator, and the one bolt that stabilizes the motor. In the picture below, you can see the motor and regulator through the right side access panel. The regulator bolts are the two black bolts above it, and the one that is in the same channel as the left bolt. The motor stabilizing bolt is second up from the bottom. The bottom bolt is for something else. The window channel, I think.

door-1_sm.jpg

When you unbolt these, have a hand on the regulator, so it doesn't just dump onto the bottom of the door. It's still attached to the window, and the motor keeps the spring in check, so it's safe.

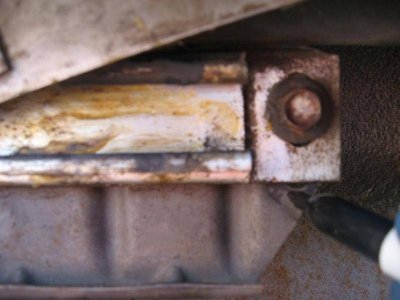
You can now take the motor off the window mounting plate. I cleverly marked the attachment plate so I could get it back to the same place later, and then realized that it didn't need to come off. I still include it here, because you want to remove the bolt on the other side. It makes pulling the regulator off and back on again easier. But otherwise, it's unrelated to the regulator, and can stay on.

lower_limiter_sm.jpg

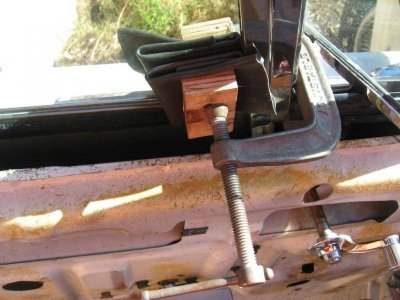
Before you pull out the regulator and motor, you should move the window to the top of it's travel. Detmatt had a good suggestion of using clamps. I thought I was going to have to leave the window clamped over night for a few nights outside (but covered), so I wanted to clamp through the wing window. I reached for some Irwin quick-clamps, but they didn't have enough reach to get around the forward frame.

Instead, I used a C-Clamp, some blocks of wood, and an old, cut-up inner tube to hold the window up without damaging it. As it turns out, the job was so fast, it all went back together the same day, so I could have just put the Irwin clamp on the back side of the door, and been done with it.

C-Clamp-sm.jpg

You can now take the regulator out. The window is safely out of the way.

General consensus was that it was frustrating to get the window out, but rest assured it comes out. I got it out in like 20 seconds. It was pretty easy. But take note of how it comes out, because I had a really tough time getting it back in.

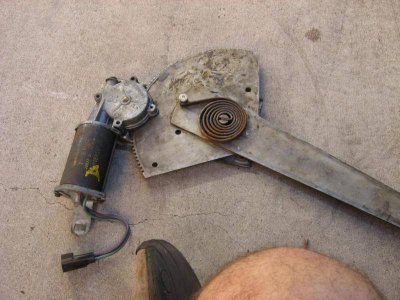
Once you get it out, this is what it will look like:

regulator-sm.jpg

The FSM says to put it in a vise to hold the arm in place when you take off the motor. This is very important. The motor is holding the arm, and keeps it from slinging away with great, finger-breaking force. (There is supposedly another way to remove just the motor, but that's for another thread. Make sure you don't let that spring uncoil; by all accounts you will regret it).

Detmatt had another suggestion, which was to use vise-grips. I used C-Clamps and vice-grips, because I'm chicken. It looked like this:

clamped-2-sm.jpg

You can now safely remove the three bolts holding on the motor, and follow the instructions at the head of the thread.

I hope this helped someone out there.

door-1_sm.jpg


lower_limiter_sm.jpg


clamped-2-sm.jpg


C-Clamp-sm.jpg


regulator-sm.jpg
 
I have had a few power window motors in and out. My mechanic bud has taught me to drill a hole through the regulator arm and the frame, put a bolt through with secure nuts, and then remove the motor-leaving the regulator in the door. No fingers cut! no pic, sorry MPJ
 
I don't know how I missed this the first time. Thank you Thank you! Looking forward to doing mine this winter. Just saved to my to do list.
 
That's a good idea, more shock absorbing than MrCs nuts...
 
Back
Top