New Member, 1967 Imperial

What I ment was that a soft line following the path you describe does not sound factory to me, my car certainly doesnt have one. There's a reason that rubber lines are kept to the minimum length on brake systems, the pressures are too great and the expansion that would occur in the rubber line would make stopping the car efficiently less likely.
 
There shouldn't even be 1" of rubber line in brake lines.
Steel tubing or reinforced flex line. Period.
 
Now that I'm back at home (short day at work), I have the parts schematic open. The PN for both the cross line and the hard lines going back are "Tube 5-53-3." I'm guessing that Chrysler meant that is the brake line bulk specification, and they anticipated you would bend them for each application.

With regards to the "no rubber in the hard lines" part, I hear you. I was surprised to hear it was done that way, stock or otherwise. I was just trying to identify the part based on the information I had.

I ordered a hard line, and I'm hoping it fits. I have bent brake line before, but I have a way to go before being competent.
 
Hope you guys don't mind that I'm keeping multiple threads going simultaneously. My intent is to ask specific questions in the different sections, but keep updating this thread as I have some updates.

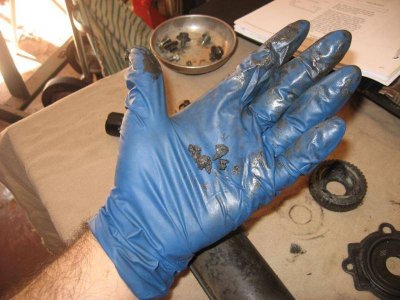
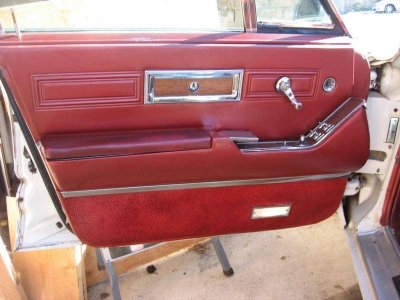
As part of dealing with my windows, of course, I'm pulling the door panels. I'm pretty happy with their condition. There's only one clip missing, and the fabric all seems intact. It needs some cleaning, but that will be easy to do with the panel removed.

door-panel-1_sm.jpg

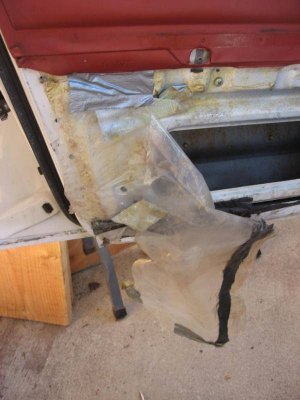
Someone has obviously been in there before, and thought duct tape was a really good way to keep the plastic on:

Panel_inside-1_sm.jpg

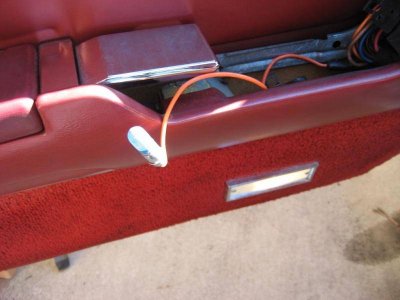
I found a courtesy light that didn't work, so I'll be going out and finding that bulb.

Light-1_sm.jpg

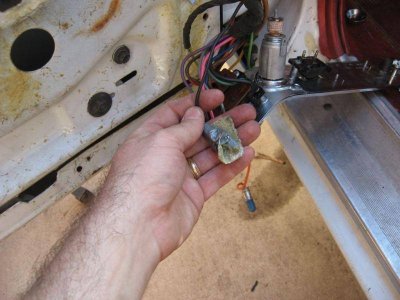
I also found out that the cigarette lighter didn't work. Maybe that's because the duct tape used to hold the wire in place had hardened over time and released it. The brown puck on the end of the lighter says something to the effect of: "this is a fuse, and if you want to reset, pull it and put it back." Do these go bad? Should I be sourcing a replacement?

Door_wiring-1_sm.jpg

I found the switch bus interesting. I expected to see all the switches wired individually. The Imperial group guys have said they get good results cleaning the switches with contact cleaner meant for trains. I have a friend really into trains. I'll run by his house and see what he's got.

No progress on muffler, however. The old one is just on there too good. I can't really take it off without cutting other exhaust pipes. Looks like I'll be returning my muffler and taking it to a shop.

door-panel-1_sm.jpg


Panel_inside-1_sm.jpg


Light-1_sm.jpg


Door_wiring-1_sm.jpg
 
Good to see the progress, trying to get the inspiration to go to my shop. I gave up a long time ago on repairing my exhaust system myself. I have a great guy that can do it for much less time, does it right and at a very reasonable price.

That is one of those jobs I never do myself any more, maybe when I eventually get my lift and don't have sparks flying inches from my face, but still probably not.
 
I had some fantasies of doing my exhaust myself, because I had just replaced my brother's in his Golf. But I forgot that I cut out his old pipes and put in a whole new system pre-bent. Not the same as trying to remove a muffler long rusted on, and not mess with anything else. So I returned it today. I'll probably stick with the plan and go get a shop to replace my single exhaust, and put on duals later, when the engine gets rebuilt in the future. Just replacing the old muffler will be a remarkable improvement.

But back to the windows.....

I had two choices: 1) take out the motor, or take out the motor and regulator together; and 2) use nylon bushings or 1/4-20 nuts. I decided to take out the motor and regulator together. I didn't really have a good visualization about where the bolts were to drill holes, and I wanted to see how it all went together before I tried an alternate. I also used 1/4-20 nuts, because I had a bunch in the garage, and I forgot to buy nylon bushes when I was at Home Depot.

I used the instructions on this thread:

http://www.forcbodiesonly.com/mopar...d-Chrysler-Power-Window-motor-clutch-assembly

I'll go back to that thread and add in some additional pictures of removing the regulator assembly, in case the next person like me wants to see how it's done.

When I got in there, it was kind of weird: there was lots of grease, so someone had been in there, but the pucks were still totally disintegrated.
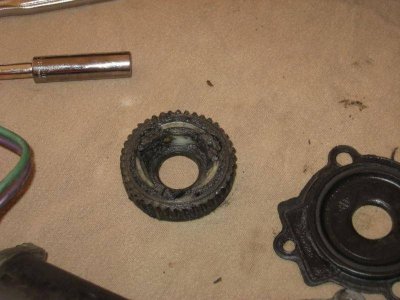
clutches_1-sm.jpg

clutches_2-sm.jpg

But it all went back together pretty easily. Or at least, the motor did. It was a real pain in the behind to get the motor and regulator back in to the door, past the forward window channel. Next time, I'm going to drill holes and pull the motor alone. I know where to lube now, and it will be way easier. Detmatt said it was a 20 minute job to R&R. I believe that. It's 20 minutes to remove and repair. Getting it back in was the hard part!

I was also glad I took some pictures while I was taking off the panel. I ended up with a screw left over. Going back through my pictures, I was able to figure out where it came from, and go back and get it in.

The only other hiccup was that I didn't expect to make so much progress today. I expected more difficulty, so I was going to remove the regulator, get it on the bench, and then fix it next weekend. But it went so fast, I did it all today. That meant I didn't have a chance to buy the light bulb and fitting for the cigarette lighter. Rather than wait, I reassembled it all. I'll worry about it another time. Kinda sucks, but I also didn't want the panels off any longer.

And I also managed to finish before dark. Sorry you guys are all having such crappy weather. I was in shorts and a t-shirt. Here's the evening view.
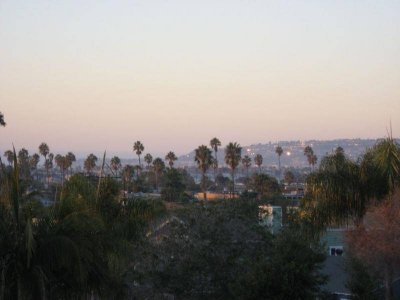
evening.jpg

clutches_1-sm.jpg


clutches_2-sm.jpg


evening.jpg
 
And I also managed to finish before dark. Sorry you guys are all having such crappy weather. I was in shorts and a t-shirt. Here's the evening view.
View attachment 23089[/QUOTE]

What the hell was I thinking when I decided to move back after I got out of the navy.
 
Nice work, glad it went well.
 
You can smile when you find you have enough space to work on your cars, and enough disposable income to do it.

A client of mine is based in Cleveland. He and I got to talking about houses. He said that an average, run-of-the-mill middle class house in his area was about 2500 sq ft on a 15,000 sq foot lot. The only place my wife and I found available in our little beach town (Ocean Beach, in case you remember) was two houses, both combined 2500 sq ft, on a 7500 sq foot lot.

So I have nice weather, but I also have a lot​ of neighbors!
 
I avoid it like the plague. We all do down here. We hide for a week. We don't go to Walmart. We stay out of Olive Garden. We fill up the week before.
Hairy bronzed guys speaking only Italian in their Lambos parked next to a lifted 4X4 crew cab Dually at Family Dollar...
You could write a sociology thesis about that week.
 
Last edited:
A little more progress today. I had a meeting at 7:00 am, so I couldn't drop my daughter off at day care. I took that opportunity to drive the Imperial and get some estimates on carb and exhaust work.

Exhaust first: Up on the lift, all the exhaust tubing looks good and serviceable. I'm going to just have the muffler replaced. I noticed that bailing wire previously noted isn't there to hang the exhaust, but instead to wire the heat riser closed (questions about this in the Engine section). It's too bad that the driver's side manifold has a leak, otherwise I'd say that I'll just look at it when I do that gasket. Now I have issues on both sides. Great.

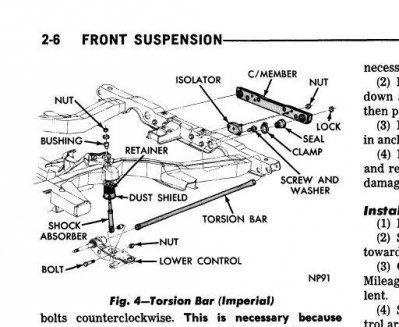
While it was up there, I took the opportunity to look at the mounting of the torsion bars. You can pretty clearly feel the torsion bar loose in the mounting. It's different on Imperials than it is on C-Bodies, there's a C-member there with an isolator. You can see the torsion bar, and move it by hand. I didn't have a chance to simply try tightening it. I don't know about parts availability. But it's encouraging that I've actually seen and touched the source of the clunk myself.

Carb: Not much to tell. Having the local carb shop put one on. It's something I can do, and have done, but I think this time I'll just have it done. He'll tune it, and make it work right. It would take me 3-4 times as long as it would take him to do the same thing. It'll be done Friday.

Plus, he has a carb for a 9-cylinder Wright radial engine in his shop.
 
I know that crossmember has to come out to get trans out don't remember how it mounts. Exhaust manifolds to head have no gaskets from factory.

Stan I would love to see that pic
 
Dave, it's not the crossmember exactly. I just put up a post in the Suspension section, but I'll repeat some here. The "isolators" seem to be rubber, well, isolators designed to separate the mounting of the torsion bars from the stub frame. I'm guessing that it was Chrysler's way of making the Imperial drive a little smoother in the transition from body-on-frame to unit construction. FSM says C/Member and isolators can be removed separately from transmission crossmember.

For reference:
c-member.jpg

-Jonathan

c-member.jpg
 
...Exhaust manifolds to head have no gaskets from factory.
...

Yes, that's my understanding as well. From what I gather, as they age, the manifolds warp a little bit, and one fix is to put in gaskets. Another option is to have them milled, but that risks cracking. A third option is to find a flat surface, lay down some sandpaper and do some self-milling. I've got a piece of granite left over from a kitchen remodel that I think is big enough to use. It's no surface plate, but I think it's flat enough.

So, I had planned on sanding and using gaskets as well. Is this a mistake?
 
I recently pulled off my exhaust manifolds (76 440) that were never previously touched. It had gaskets.
And when they go back on, I'm using gaskets.
RE: Picture. Race week is the second week in March. I'll keep a camera with me.
 
Back
Top